3 Round Liner vs 3 Round Liner Tattoo Needles

Hello PMU Artists,
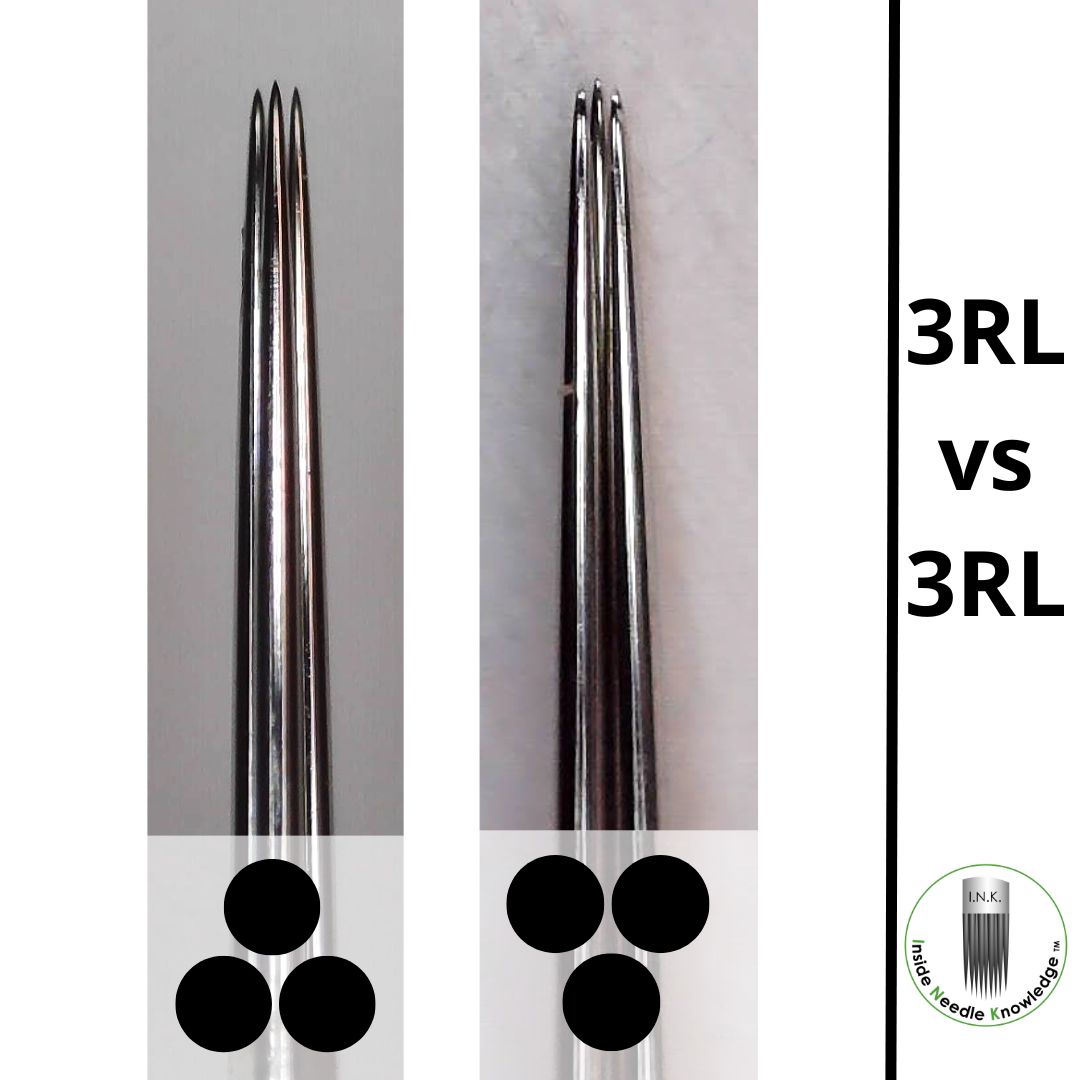
Have you ever noticed the differences in how a 3 Round liner or shader needle are arranged? Maybe you're tattooing and seeing a different pattern when you switch from brow to brow or you notice a color difference. Maybe your eyeliner got too thick on the inner part...
Of course this can be one of many "needle influencers" such as your speed, stretch angle depth, or pressure, but for a start, I would recommend to take a close look at your needle arrangement.
Are you leading your needle with 1 needle or 2?
Not only can the needle spacing be unique to each needle manufacturer but the needle arrangement is to consider as well.
If you're trying to create a very thin line on the inner portion of the eyeliner, or a crisp line for lips it is most helpful to recognize exactly how your needles are configured so you can be precise when tattooing.
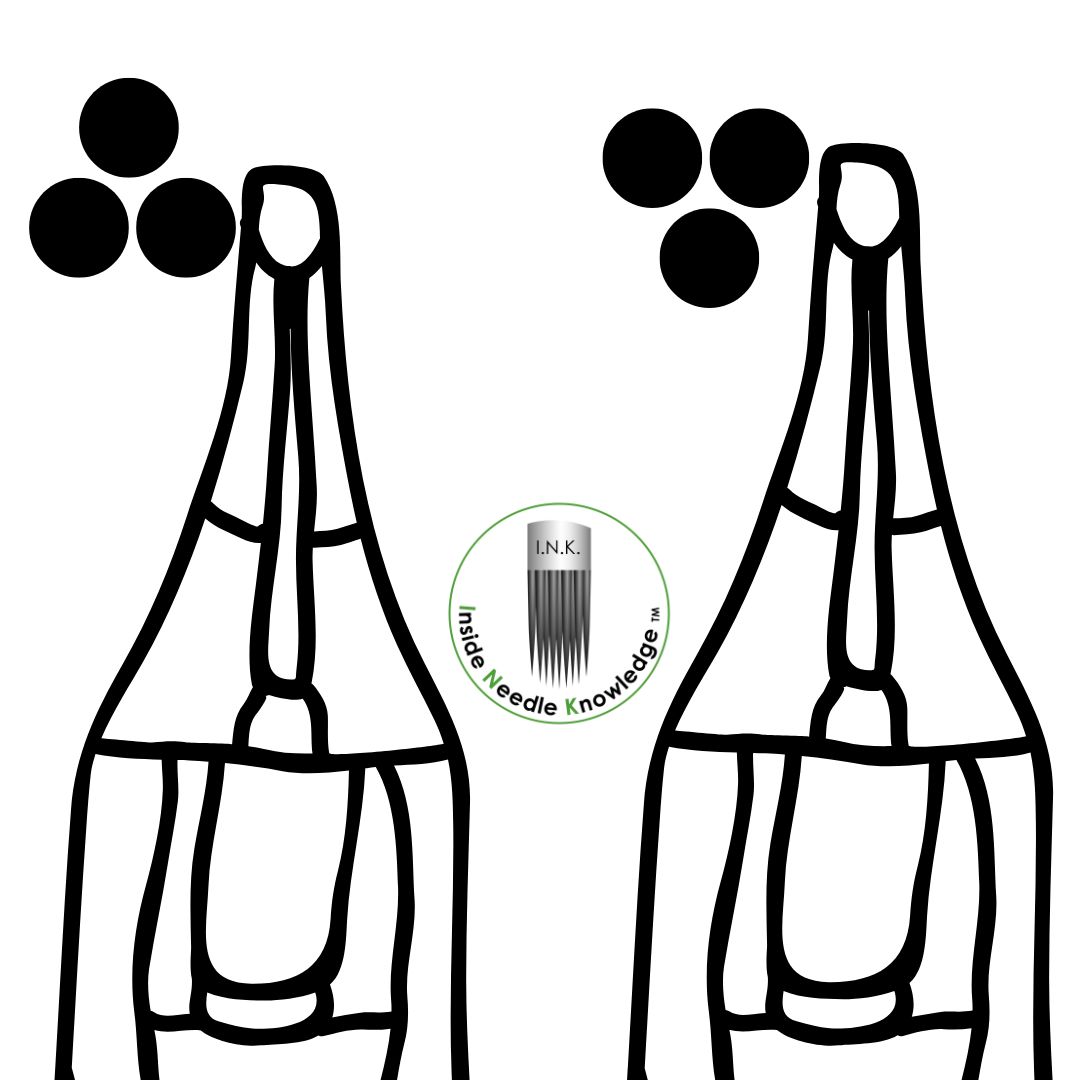 Once you pay attention to this you may find yourself rotating your machine for those tiny details where the line size matters, such as the inner and outer eyes.
My preference can vary but I typically like to see 1 needle on the top and 2 on the bottom of the cartridge tip. This arrangement allows for precise control and crisp lines. If you use the Tina Davies 3RL, you will notice it is arranged like this.
To your PMU success,
![]()
PMU Artist & Needle Specialist
Inside Needle Knowledge